Power Supply Connections
The TankerTherm 123 ships in two voltage variants. The connection procedure is identical; only the supply voltage differs. Confirm your unit’s SKU on the unit nameplate before energizing.
| SKU | Supply | Connection block label |
|---|---|---|
|
480 VAC 3-phase, 36 kW |
|
|
600 VAC 3-phase, 36 kW |
|
|
Qualified electrician required
All electrical connections must be performed by a licensed electrician in compliance with local electrical codes. Disconnect and lock out the power source before beginning any electrical work. |
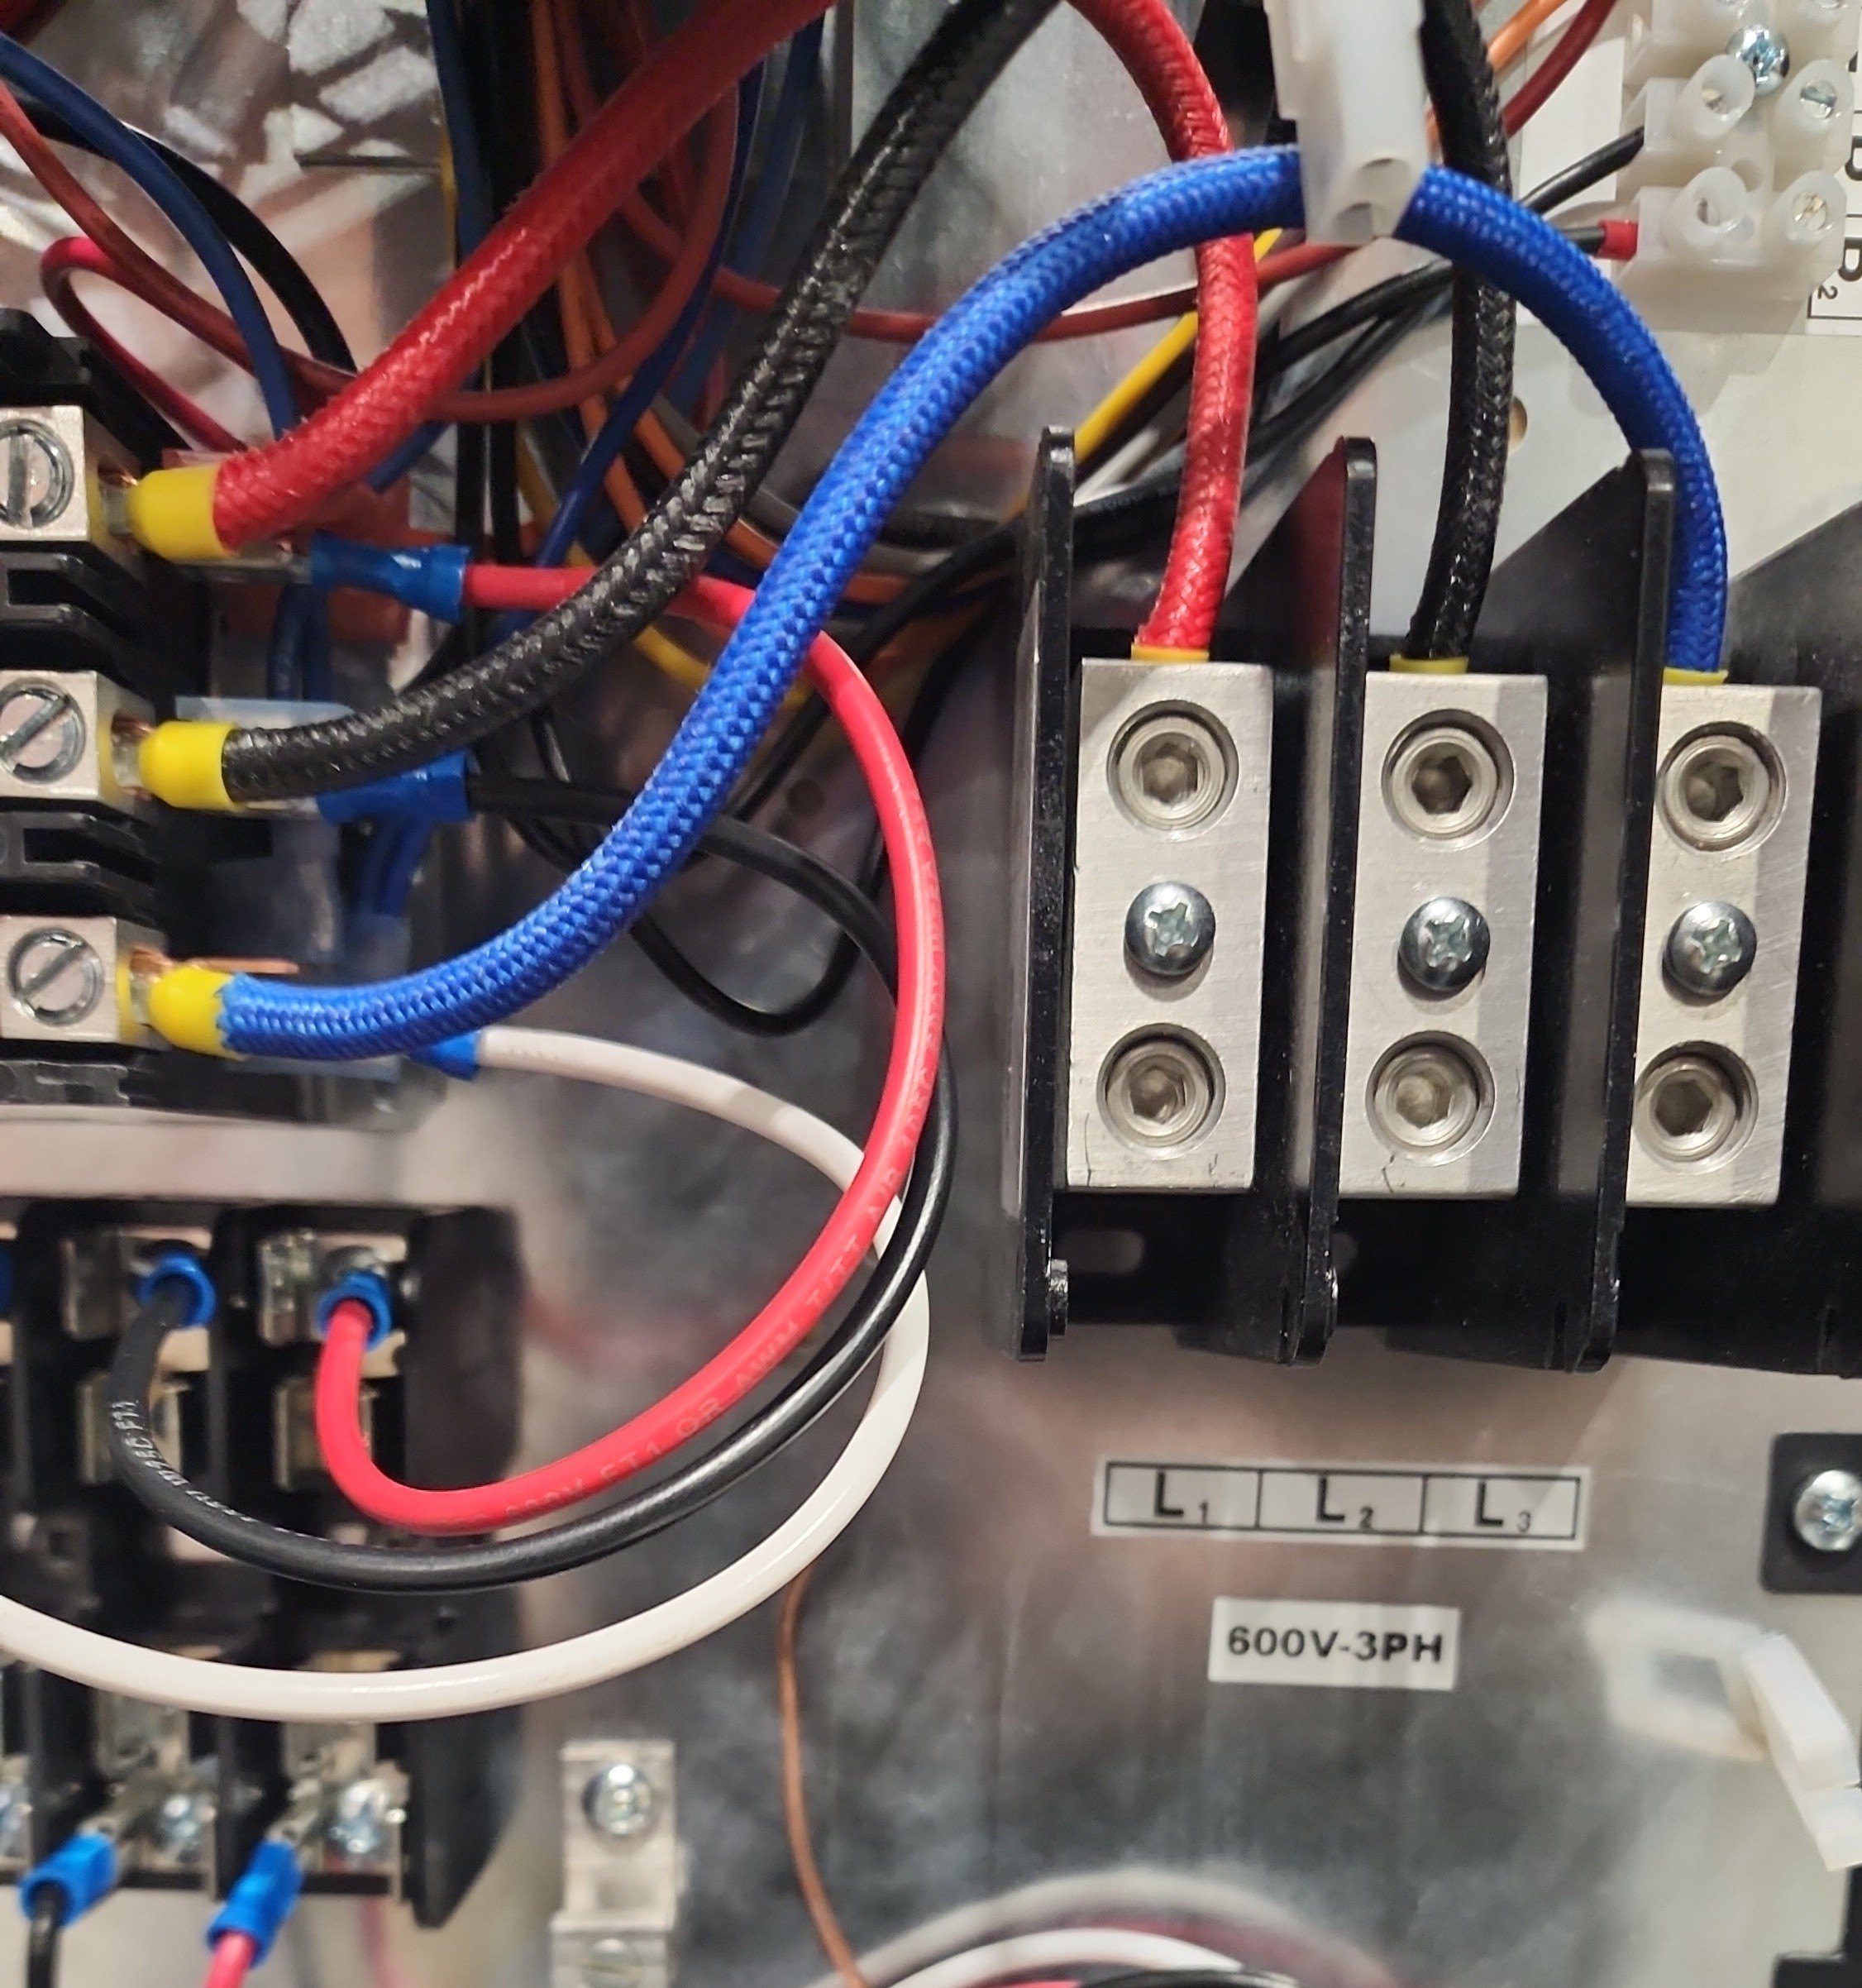
L1, L2, L3 lugs labelled 600V-3PHConnection procedure
-
De-energize and lock out the supply.
-
Open the upstream main disconnect that will feed the unit.
-
Lock out and tag out the disconnect per site procedure.
-
Verify zero voltage on the supply conductors with a properly rated meter.
-
-
Remove the boiler cover and set it aside while you make the connections. Reinstall it when the connections are complete and checked, before the unit is energized.
-
Route electrical cabling in through the 4×4 pull box on the rear of the cabinet.
-
Run cables through the attached conduit into the boiler.
-
Connect the 3-phase wiring — at the supply voltage matching your SKU (480 V or 600 V) — to the labelled connection block.
-
Connect the grounding conductor to the grounding lug.
|
The boiler face is live whenever the main disconnect is closed
Once the supply is connected, the boiler face is live whenever the main disconnect is closed. Before touching any wire at the boiler face, open the main disconnect, lock it out and tag it out, and verify zero voltage — see Safety. Install the boiler cover when the connections are complete and checked. The air purge is run from the PLC and does not need the cover off — see Startup & First Heat Cycle. |
Verify before energizing
Before applying power, verify:
-
The unit’s SKU and nameplate voltage match the supply voltage
-
All three phases land on the labelled connection block (
480V-3PHor600V-3PH) -
Grounding lug is secured with a properly sized conductor
-
No loose conductors or debris inside the boiler
-
Boiler cover is installed
-
Conduit entries are sealed against weather
Next step
Proceed to Initial System Fill to fill the glycol storage tank before the first startup.